How To Host Tournaments On Tourvex Esports Hub
Hello, and welcome to Tourvex Esports Hub. We are changing the ecosystem for Nigerian gamers and in this guide, we will walk you through the easy process on how to host and organize tournaments. This guide will introduce you to everything you need to know from setting payouts, choosing tournament formats, brackets, etc.
Your time won't be wasted as this is a very short and straightforward guide. Without any further ado, let's dive in on how to launch esports tournaments online in Nigeria.
Steps to Host Tournaments On Tourvex Esports
Use the detailed steps below to get started:
Step 1: Register for An Account
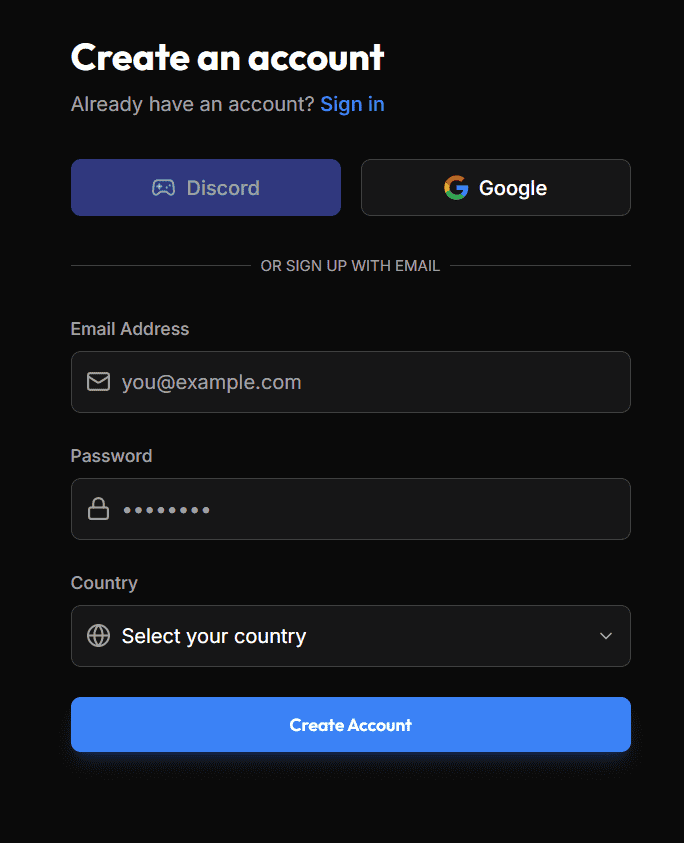
Tournaments can't be hosted unless you have an account. To create one, visit the Signup/Login Page. You can create an account using Google, Discord or using your email and password. A verification link will be sent to the provided email address (if you login using email) Note: "Emails might enter Spam Box, so do check!"
Step 2: Start Organizing
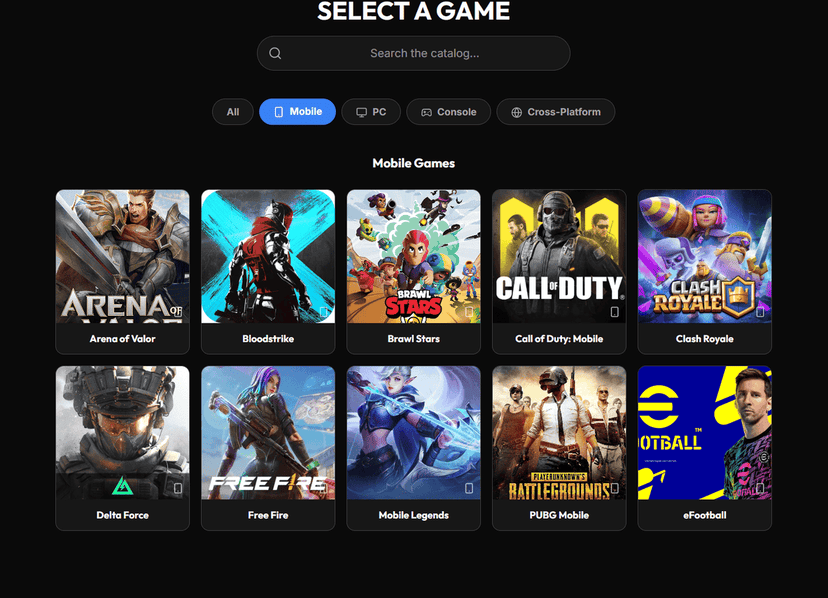
Hosting a tournament simple means you're an organizer. Once logged in to your user dashboard. Click on Create Tournament. Once done, you'll be asked to select the game you want to organize a tournament on.
Step 3: Enter Basic Information
A tournament needs basic information like whats been mentioned below:
- Tournament Type: (Solo, Duo, Squad).
- Tournament Name.
- Start Date and Start Time.
- End Date and End Time.
- Registration Period (Start and End)
- Header Banner (A 1290px by 600px image of your tournament).
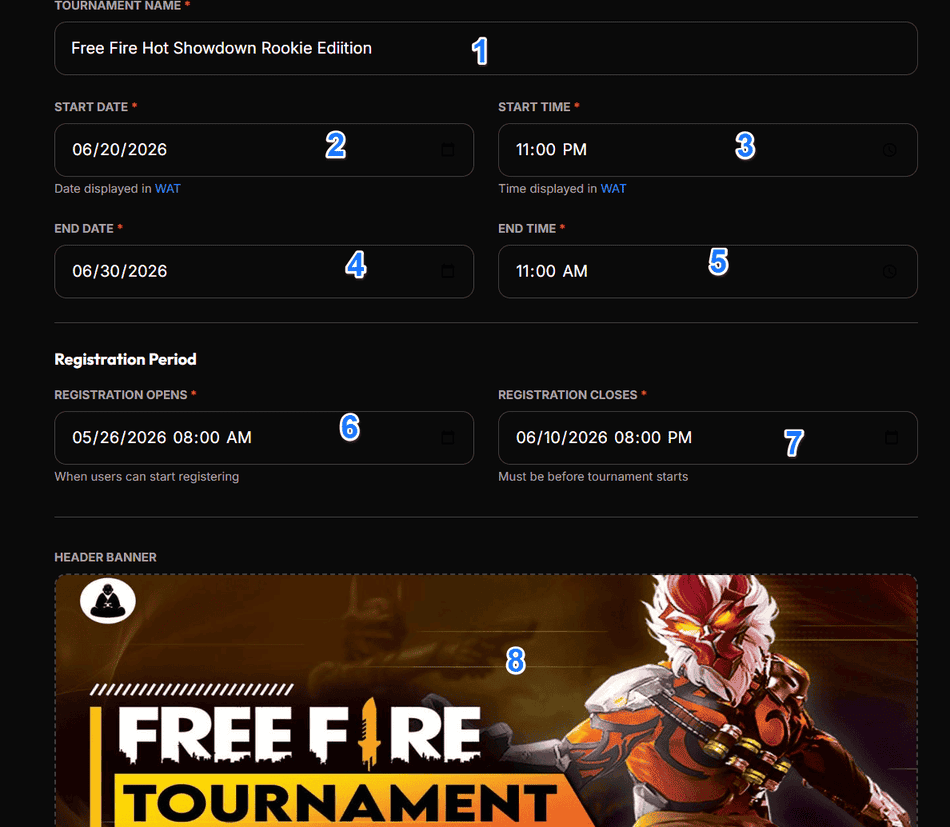
Note: "Tournament Type" solely depends on the game you selected. For Battle Royale Games, you'll mostly see Solo, Duo and Squad.
Step 4: Enter Tournament Information
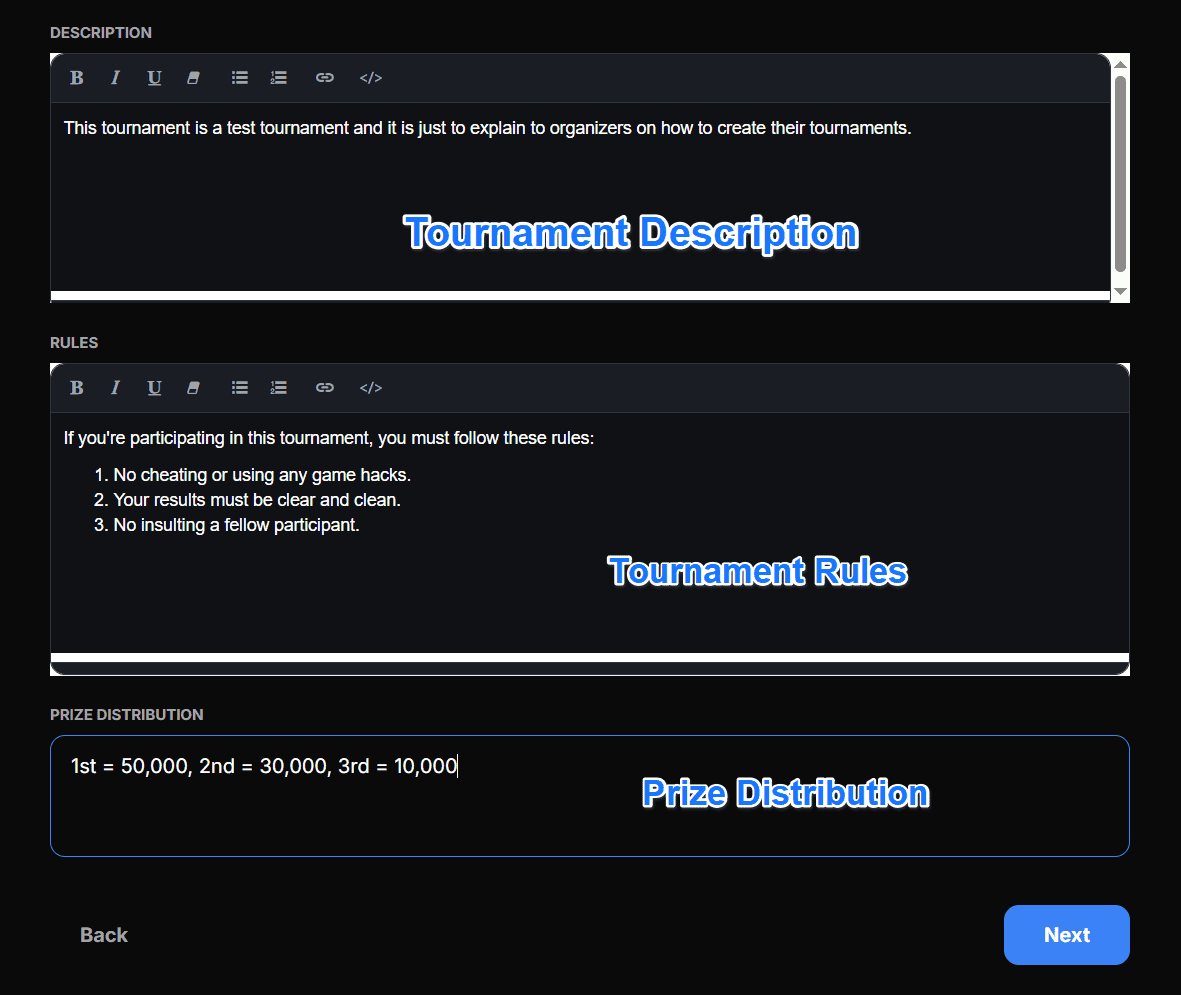
What you'll need to do next is give your tournament a description. You can also set the rules of the tournament and also an overview of the prize distribution. There's a rich text editor that'll let you enter the rules and description properly.
Step 5: Set Tournament Settings
With the above steps done, the next thing is to decide the settings your tournament will have. You can decide if it's a paid tournament or a free one. For the settings, you'll need to do the following.
- Enter Max Participants: Depending on the tournament type or game, you can enter from 2 participants upwards.
- Tournament Format: Choose from Single Elimination, Double Elimination, Robin Round, Swiss Formats, Battle Royale, TDM, depending on the game you're hosting a tournament on.
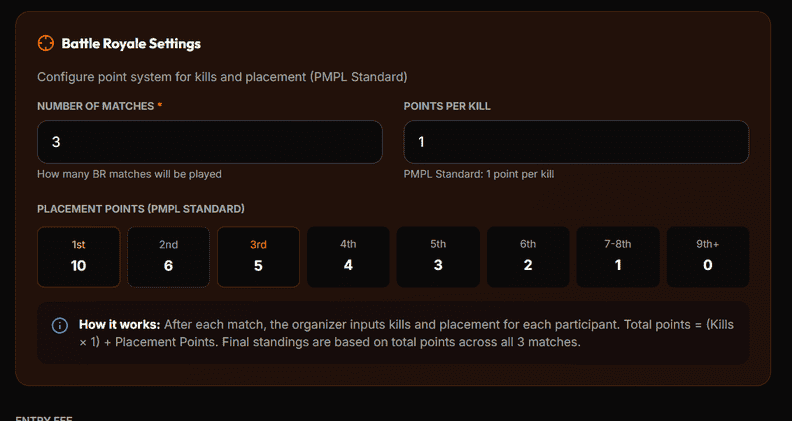
- Tournament Format Settings: For example you selected Battle Royale. You must set Number of Matches and Points Per Kill.
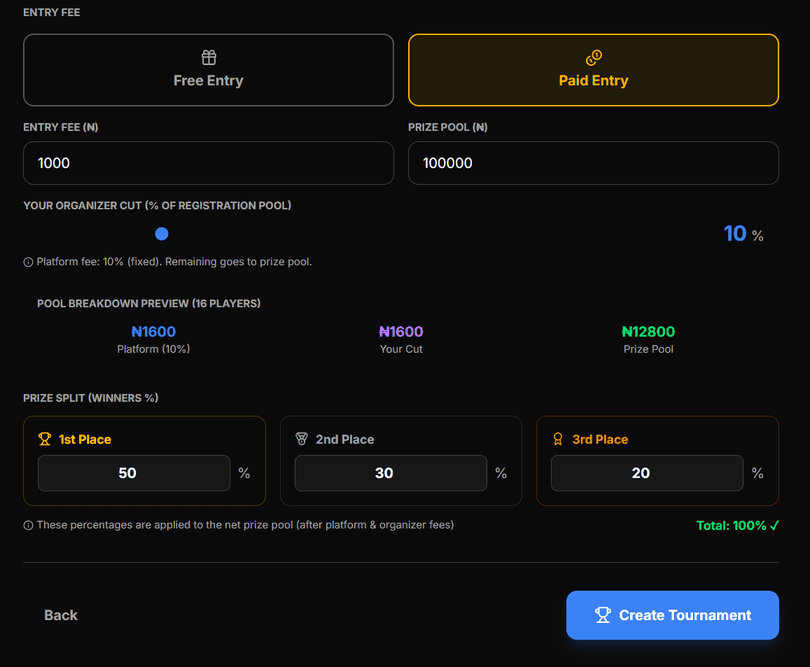
- Entry Fee: We have two options available, which are Free and Paid Entry. For Paid Entry, we take 10% of the total prize pool. Set the Entry Fee and Prize Pool.
- Organizer Cut: Organizers can take from 0 to 50% of the prize pool. So make sure to set the percentage you're getting from the tournament.
- Prize Split (Winners): Only 3 Winners are allowed. Set the winning percentage from 50,30 to 20%. Once done, click the Create Tournament Button.
What Next After Creating Tournament?
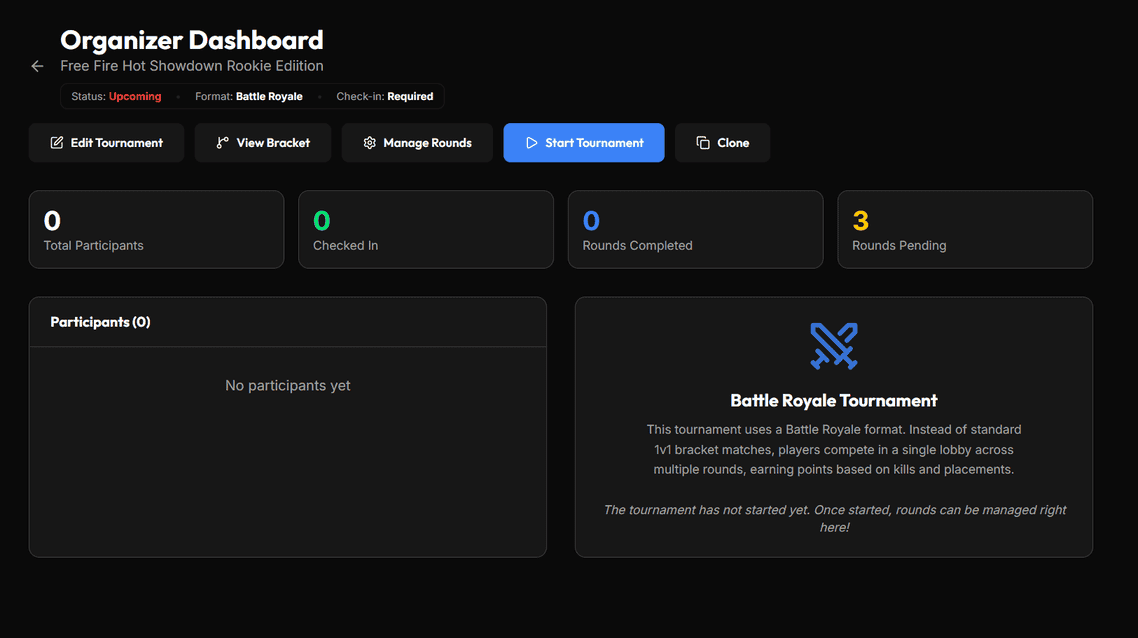
After creating your tournament, you'll see the tournament detail page. From there you can share the link to interested participants. You can also go to your dashboard for a comprehensive management of your tournaments.
Comments
Leave a Comment
No comments yet. Be the first to comment!